State testing is behind us...it's amazing how stressful it is! You don't realize you have been "holding your breath" the whole week until Friday rolls around and you are EXHAUSTED!
As the next week approaches May Madness begins. The emails are filling my inbox...Field Day, Awards Breakfast, Awards Day, EOY party, Report Card Timeline, fill this survey out for the EOY, don't forget to update your perms, all day planning (to plan for next year), Relay for Life...and I could go on and on.
Not to mention trying to keep the students from going CRAZY! The few things I have planned are: cursive, health lessons, benchmarks (yep got to give those a week after testing), a new potato unit (a little fun, but I'll fill you in later)...which includes a read aloud and activities, and because of the common core change we have to work on the math "gaps"...meaning the lessons and such the students won't get next year because those skills are moving to other grade levels. Overall I am not too concerned about keeping them busy.
This week we have Field Day, which brings me to THE Hole update. Sorry no pictures, but it is filled, and they spread that gravel type stuff over it (to help control the mud. So as far as we know Field Day on the actual field is A GO!!!
So the next thing on my agenda tonight is a little Q and A session. There have been a few questions asked that I thought I would try and address in the next few posts, mostly about my classroom decor...as some of you are beginning to plan and think about next year!
My outside displays:
This was my first one...
This was my second...
I simply laminate the paper I want to use. When doing the leaves I drew them cut them out ad then laminated them. I use nothing BUT hot glue on my outside displays...it's the only thing that stays. Which means I also have a paint scraper handy for when I take them down.
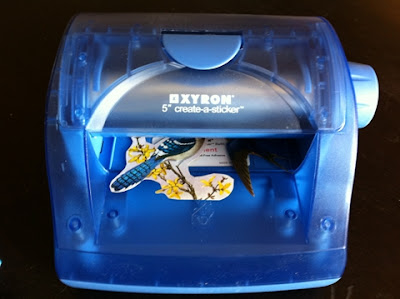
The clothespins were pretty easy. I cut the scrapbook paper I wanted to use to the width and length of the front of clothespin. I then ran them through my sticker maker (if you don't have one of these and you craft or love to make your own things...it is a HUGE time saver).
Once I run them through this, I simply stick them on to the clothespin. As for the sign it is hand made. Another huge time saver is my Cricut machine. Most of the lettering you see in my classroom is cut from my Cricut. I LOVE it!!! The cartridge I use the most is called Feelin' Groovy. By using the Cricut I can also get the shadow or two/tone colors on my letters.
Which brings me to my next and last follower question for the night, my Pinterest inspired sign:
You can find the entire tutorial here. But the specific question was, once again, about the lettering. I used my Cricut...shocker I know! It is simply black, self-adhesive vinyl. I used different cartridges that I have to make the different fonts...probably a total of 6 (Feelin' Groovy, Billionaire, Ashlyn's Alphabet, All Mixed Up, Cherry Limeade, Cuttin' Up). By using the different settings: shadow, regular, and size I was able to get different looks for the sayings. I will admit that this was not an easy thing to make, but really really worth it to me.
Watch out for my reading unit and more answers to YOUR questions!!


