Wednesday, June 29, 2011

Bowling and Cheerios


So today was the first time Ashlyn has ever gone bowling. I wasn't too sure how she would do. Could bowling keep my 2yr old (who has an attention span of a gnat) interested? Well needless to say after taking some time to warm up to the loud sounds, strange shoes, and having to take turns...she LOVED it! 

A few lessons from dad

Discussing ball color...the orange was a hit!
She became very focused and serious

So while tossing and turning last night I was thinking of easy things/activities that would keep Ashlyn entertained for the remainder of the summer. Then it dawned on me...why not do the easiest thing, something every preschooler and kindergartner does...make a cereal necklace! Not only did she love it, but it kept her so focused and busy, we may make one everyday. If you need a tutorial on this just ask and I can email it to you :O) 

It took a lot of concentration
Getting started
Whoa! Look how long it is

All done!

And what good is a craft if you can't eat it?!

Tuesday, June 28, 2011

Yarn Wreath

So I had seen something similar on Etsy and once again I thought...I can do that. Well I think I learned how not to make this wreath. But I guess my trial and error is to your benefit. 

Materials: Yarn (colors of choice), wreath from Hobby Lobby or JoAnns, hot glue gun, embellishments (I chose to use handmade flowers...click here how to make those...and buttons.

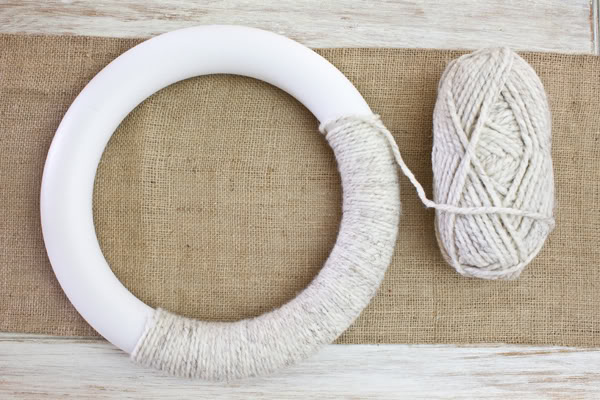
TIPS: Choose your wreath, keeping in mind the larger the wreath the longer it will take for you to wrap it in yarn. For my first wreath I should have chosen a smaller one, as well as a foam one. I made a huge mistake of buying a straw wreath (what a mess!). Choose your yarn wisely too. I chose a thin cotton yarn. I loved the feel, look, and texture, but because of how thin it was...it took FOREVER to wrap the wreath. 

Step one: Hot glue the end of your yarn to your wreath, and begin wrapping your wreath. Another tip...try to keep your yarn ball from falling apart, makes for rough wrapping. Again by choosing thinner yarn I had to wrap it twice to cover it completely.


Step two: hot glue your embellishments...yep it is that easy!!

Here are a few inspirational pics of other wreaths I have seen online. One idea is to also take a small branch and cover it by wrapping it in yarn as well.


Monday, June 27, 2011

Randomness...

Or should I say follower...I have a follower!!!!
THANK YOU

Can you tell I am slightly excited to see that not only does someone read my blog, but they actually want to follow it!?

In other news just a small thing to share, my FAVORITE font website. I love fonts and tend to get in trouble some times because I download fonts from the wrong places...and BAM virus. So I was thrilled to find a trustworthy website that offers fun fonts. I just wish I could blog using them, and if any readers out there know how to do that, please share! Click the picture below to visit their website.

Finally, I found this button that completely is me...
For my friends that have visited me to pick out bucket goodies know that my craft supplies, storage, and work area is literally in a closet!!!


Sunday, June 26, 2011

What I do....

Other than my first job, teaching, and then being a mommy and wife this is what
Dandelions and Dragonflies is... check out my FB page: Dandelions and Dragonflies


Anthropologie Lace Flower Necklace: Updated

As seen on Tatertots & Jello, as well as Little Miss Momma  


So I completely LOVED this tutorial and necklace. But I felt it was just way too big for me. I don't wear a lot of jewelry, but I really liked the idea of using one of the flowers as an accent piece. This is what I came up with:

First, Follow the tutorial above to make the flowers.

Step One: Cut another circle from felt and hot glue it to the back, I did this to add more stiffness to the flower. 

Step Two: Choose clip or pin back you would like to use, I made one of each. I chose the alligator clip so that I could clip it to necklaces I already had (see before/after picture), and I also chose the pin so that I could wear it separately on a sweater or t-shirt.

Step Three: Hot glue it to the back, and you are set!