If you don't remember or are new to my blog...I posted a few Thanksgiving lessons last year (click here). One "addition" I made this year was to expand the Twas the Night Before Thanksgiving lesson.
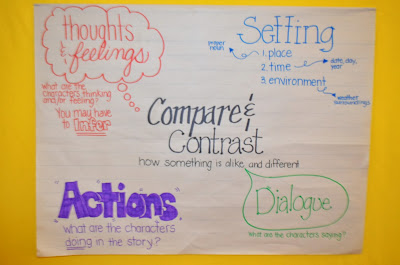
This year I am reading the book to my kiddos, after a few leading questions and discussion...I hope that they will realize the similarities to Twas the Night Before Thanksgiving. I will then give them the Venn Diagram with the QR code in the corner (see below). The QR code links them to a You Tube video of an animated reading of Twas the Night Before Christmas. They will watch the video then use the Venn Diagram to compare and contrast the two poems. Click below for the printable, there are two per page so they can glue it into their Reading journals.
After we share our "findings" and complete a class Venn Diagram they will then make their Turkey Survival Kit booklet (what we can sell to turkeys so that they can survive Thanksgiving without becoming dinner).
Finally tonight I'm going to leave you with one of our art lessons....I had a lot of fun with this fall/Thanksgiving craft. Sorry in advance for the sideways pics, when I uploaded them from my phone they are showing up correctly in my gallery but as soon as I put them in blogger they flip!
Step 1: Go on a nature walk and collect leaves, who doesn't like doing that?!
Step 2: Using fall colors complete a leaf rubbing, overlapping the leaves and colors.
Step 3: Print (in different fonts) words such as Thankful, Fall, Thanks, etc. Have the students choose one and tape it to their desk. Then discuss the definition of overlay and give examples. Hand them an overhead projector sheet (transparency)...they flipped out that they were going to use one! Give them a Sharpie and have them trace the word from the printed page to the transparency, by laying it on top of the one taped on the desk.
Step 5: Tape the leaf rubbing inside the frame, tape the overlay over the rubbing, close the frame and tape it shut if you want. I LOVE how these came out (did I say that already)
Here are a few more
As an added bonus for my loyal readers I am attaching some QR codes! Here are two sheets of codes that when scanned will just show text...the numbers 1-36 (each QR code is a different number). You can use these for many things.
My students wrote descriptive paragraphs for their monsters from the I Need My Monster glyph activity. When writing the paragraph they used the descriptive words and such that they wanted their monsters to actually look/be like. They were also "cryptic" in their writing, so as to not give away which monster was theirs too easily.
Using the paragraph they wrote and the glyph key students from another class, and their parents, had to try and find that monster...located on our monster wall (each monster has a number attached to it). Once they guess which monster fits that description they then scan the attached QR code to reveal the correct monster's number...to see if they were right! I can see us doing many different activities like this in the future. Feel free to use these codes and let me know what you use them for!! Click here to download.
Finally I leave you with this...I have changed my behavior management by adding Class Dojo! THEY LOVE IT, and so do my parents!!!! I'll have to update you on that soon!
Have a WONDERFUL Thanksgiving!


.JPG)
.JPG)
.JPG)
.JPG)


.JPG)
.JPG)
.JPG)
.JPG)


